Ironing is an activity that may appear mundane, yet it plays an essential role in presentations of n...
2025-08-16 16:20

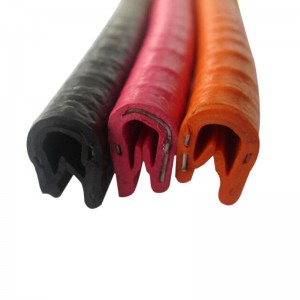
 This type locks onto the doorframe, creating a robust barrier against drafts This type locks onto the doorframe, creating a robust barrier against draftsexterior door weatherstripping types. Although installation requires precision and may involve some modifications to the doorframe, its durability makes it a long-lasting choice for areas with substantial environmental extremes.