The XL ironing board cover is more than just a cover for your ironing board; it is an essential tool...

2025-08-17 11:51


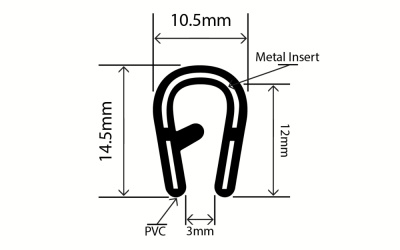
 Next, measure the length needed for each side of the door and cut the stripping material accordingly Next, measure the length needed for each side of the door and cut the stripping material accordinglythick exterior door weather stripping. Apply the adhesive and press the stripping firmly into place, ensuring there are no gaps or overlaps. For added protection, some may choose to use a caulking gun to fill any remaining small gaps around the perimeter.