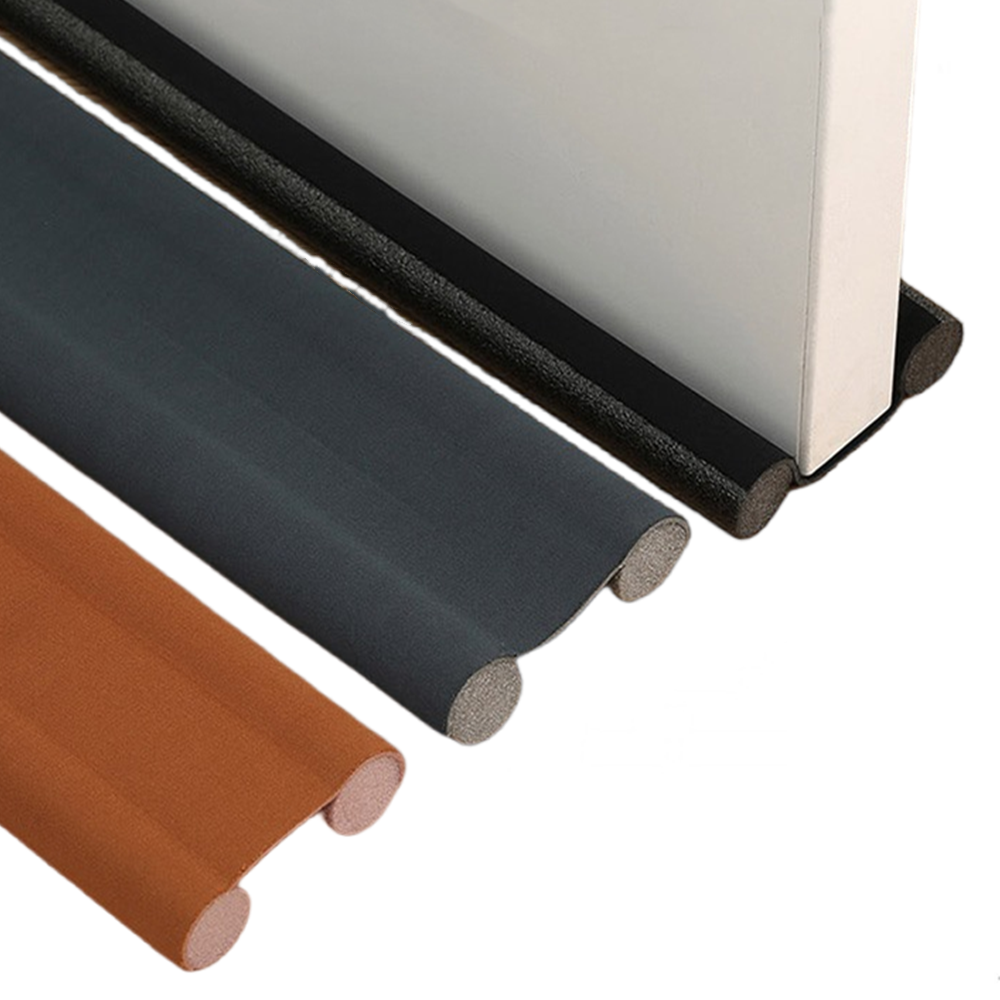
Current location:Home > ironing board cover 115 x 38_ironing board cover 36 x 12 >

ironing board cover 115 x 38_ironing board cover 36 x 12

Convention table covers serve as a pivotal element in enhancing the aesthetic appeal and professiona...
convention table covers
2025-08-16 17:29
In recent years, with the improvement of family requirements for quality of life, washing machine co...
‌ Washing Machine Cover Industry Ushered in New Development Opportunities
2025-08-16 17:22
Choosing the right ironing board cover can make a significant difference in your garment care routin...
spotty ironing board cover
2025-08-16 17:06
Heavy Duty Picnic Table Covers A Perfect Blend of Protection and Style When it comes to outdoor dini...
Durable Picnic Table Covers for Long-Lasting Outdoor Enjoyment and Protection
2025-08-16 17:04
Exploring the realm of ironing board covers can lead you into a world of unusual designs and feature...
unusual ironing board covers
2025-08-16 16:48
Tabletop ironing board covers and pads, although seemingly simple household accessories, play an ess...
tabletop ironing board cover and pad
2025-08-16 16:40
The quest for the perfect white table cover can be as intricate as it is rewarding. A table cover do...
Ironing Board Cocer-Us
2025-08-16 16:15
Imagine effortlessly steaming your clothes, curtains, or upholstery, all while sparing yourself the...
steamer glove
2025-08-16 15:52
The Elegance of Gold Disposable Tablecloths A Sparkle for Every Occasion In the realm of event plann...
Elegant Gold Disposable Tablecloth for Stylish Events and Gatherings
2025-08-16 15:28
The XL ironing board cover is more than just a cover for your ironing board; it is an essential tool...
xl ironing board cover
2025-08-16 15:21
  • 1
  • 2
  • 3
  • 4
  • 5
  • 6
  • 7
  • 8
  • 9
  • 10
  • Latest articles
    4. Fit the new seal Start by attaching one end of the new seal to the top corner of the oven door
    how
    how to fit universal oven door seal. Make sure it's securely in place before moving on. Then, slowly work your way around the sides and bottom of the door, pressing the seal firmly into the groove. Take your time to ensure the seal is properly fitted and doesn't have any twists or kinks.